The post The Problem With Electric Furnaces appeared first on Carbon Switch.
]]>Many homeowners replace broken HVAC systems with a new version of the same product. But if you have an electric furnace, this decision could cost you $10,000 to $25,000 in unnecessary utility bills over the next 10-20 years.
That’s because electric furnaces are one of the least efficient ways to heat your home. The average homeowner can expect to pay about $1,300 per year to heat their home using an electric furnace.
By comparison the average homeowner can expect to spend $500 to $600 heating their home using a heat pump. In other words, electric furnaces cost about twice as much to operate than heat pumps.
In this guide we’ll go over how electric furnaces work, the pros and cons of installing an electric furnace, and how they compare to heat pumps and other heating systems.
How do electric furnaces work?
You can think of an electric furnace working like a massive hair dryer. Colder indoor air is pulled into a heat exchanger where it is heated over electric heating elements. A blower fan then blows the warm air through ductwork to heat your house.
Your home’s thermostat is connected with the furnace to control when the heating elements and blower fan turn on. If the indoor temperature is below the set temperature, they turn on, and when it’s reached, they turn off.
Unlike gas, propane, and oil furnaces, electric furnaces don’t need venting since there’s no risk of CO2 poisoning.
Electric furnace sizing and capacity
Electric furnaces are generally sized in two units: British Thermal Units (BTUs) and kilowatts (KWs). These are different metrics that essentially communicate the same thing: how much heat a furnace can generate.
1 KW is equal to 3,412 BTUs.
Here’s a table showing the most common electric furnace sizes in KWs and BTUs:
| KW | BTUs |
| 5 KW | 17,000 BTUs |
| 10 KW | 34,000 BTUs |
| 15 KW | 51,000 BTUs |
| 20 KW | 62,000 BTUs |
A home in a moderate climate needs about 25 to 45 BTUs per square foot. If you’re in a cold climate zone, you’ll need 45 to 60 BTUs per square foot.
But these are just rules of thumb that can give you a roundabout idea of your home’s needs. The best way to figure out how much capacity you need for a furnace or heat pump is to get an energy audit or a Manual J test.
Electric furnace prices and cost
Electric furnace prices range from $650 for small budget furnaces to about $5,000 for large, variable-speed models.
Models with variable speed blowers are able to keep your home at more consistent temperatures and save energy, but they’re also more expensive. High end brands like King Electric, Stelpro, and Winchester cost between $1,100 and $5,600 before installation.
Single speed blower models will have less temperature variability, but cost less. Budget brands like Goodman and Direct Comfort cost between $650 and $900 for the unit alone.
Average installation cost
According to Modernize, the installed cost of an electric furnace ranges from $1,200 to $5,900. The average cost to install an electric furnace is about $3,500.
Installation costs vary depending on the following factors:
- Whether or not you need to install new ductwork
- Whether or not you need to do any electrical work
- The size of your home
- Whether it’s a new install or a replacement
New installs are generally more expensive than replacements because of all the other work you’ll need, like installing new ductwork.
The larger your home, the larger the furnace you’ll need to adequately heat it. Electric furnaces are sized by the kW or BTU.
But installation cost isn’t the only thing to consider. While electric furnaces cost less upfront, they are far less energy efficient than heat pumps. Installing an electric furnace could cost you $10,000 to $25,000 in unnecessary utility bills over the next 10-20 years.
Average cost to operate per year
The average home in America is about 2,000 square feet and uses 35 million BTUs of energy for space heating. That’s the equivalent of about 10,000 kWh per year. So at an average price of $0.13 per kWh for electricity, that means electric furnaces cost about $1,300 per year on average to operate.
But if you live in a colder climate, you can expect that number to be much higher. For example, in the Northeast the average home uses about 50 million BTUs of energy for space heating, or roughly 15,000 kWh per year. And electricity costs about $0.20 per kWh there. So if you live in the Northeast, electric furnaces cost about $3,000 per year.
Here’s a table showing how much it would cost the average homeowner to heat their home using an electric furnace by census region:
| Census region | Annual heating cost |
| South | $891 |
| Pacific | $944 |
| West | $1,069 |
| Mountain | $1,157 |
| Midwest | $2,100 |
| Middle Atlantic | $2,561 |
| Northeast | $3,036 |
Pros of electric furnaces
- Electric furnaces are relatively cheap and easy to install. The upfront costs are about half the cost of a gas furnace or heat pump.
- They have a long operating life and are easy to maintain. A good electric furnace can last for 20 to 30 years.
- Electric furnaces are safe to run and don’t have the risks of carbon monoxide like gas furnaces.
Cons of electric furnaces
- They are expensive to operate. The upfront savings you get will be quickly eaten away by high energy bills.
- Electric furnaces are not well suited for colder climates (mostly because you’ll spend a fortunate on electricity)
- Most of the country still relies on coal for electricity. That high electricity use equals a larger carbon footprint.
Electric furnace vs. heat pump
The main benefit of electric furnaces compared to heat pumps is their lower upfront cost. But this comes with a major tradeoff: electric furnaces are far more expensive to operate than heat pumps.
Heat pumps use advanced technology to heat and cool homes at 200-400% efficiency. In other words, they turn 1 kWh of electricity into 2 to 4 kWh of heat. The result: much lower utility bills.
Why an electric furnace is better
- An electric furnace is cheaper to buy and install. The upfront cost of a heat pump is on average $10,000, compared to an average of about $4,000 for an electric furnace.
- It has a longer lifespan. An electric furnace will last 20 to 30 years with regular maintenance, while a heat pump will last about 15 years because it’s used year-round (to heat and cool your home).
Why a heat pump is better
- It’s far more energy efficient, which equals much lower energy bills. When you switch from an electric furnace to a heat pump, you’ll save $815 a year. That savings will pay back the upfront cost in 11 years.
- A heat pump is heating and cooling in one. The same energy efficient heat exchange process keeps your home comfortable year round.
- All electric furnaces require ductwork. Heat pumps on the other hand come in ductless models, often called mini-splits.
- The energy savings also means you’ll reduce your carbon emissions. Switching from an electric furnace to a heat pump reduces your home’s yearly carbon dioxide emissions by an average of 5.1 metric tons.
- It’s a more comfortable heat. Electric furnaces produce a dry heat that can cause dry skin and irritate allergies and asthma. A heat pump pulls in air from outside for heating, which has more moisture.
Electric furnace vs. gas furnace
The main advantage of electric furnaces compared to gas furnaces is the fact that they don’t require a gas line. If you’re home doesn’t already have a gas line it generally costs about $1,000 to add one. But in some cases – like in more rural places – it’s not even possible.
If you have a gas line, then the main advantage of a gas furnace is the fact that natural gas is generally cheaper per BTU than electricity.
For example, based on average utility rates in America, it costs about $16 per delivered BTU to use an 80% efficiency gas furnace. An electric furnace by comparison costs about $41 per delivered BTU. In other words, it costs 2.5x more per BTU to heat a home with a gas furnace than an electric furnace.
It’s worth noting that because a heat pump runs at 250% efficiency, they cost about the same per delivered BTU as an 80% efficiency gas furnace — about $16 per delivered BTU. But in the case of a heat pump you get air conditioning too, hence why they are generally regarded as the best option.
Why an electric furnace is better
- An electric furnace has a lower upfront cost than a gas furnace. A gas furnace requires extra infrastructure for piping in natural gas and venting out the carbon monoxide gas that’s produced from combustion, which makes it cost around twice as much to install.
- An electric furnace is safer because it doesn’t produce carbon monoxide like a gas furnace.
- An electric furnace will likely last longer than a gas furnace. It won’t need replacing for 20 to 30 years compared to 15 – 25 years for a gas furnace. Maintenance is also easier and cheaper to keep up with.
Why a gas furnace is better
- A gas furnace has much lower energy bills because of the lower cost of natural gas.
- If the power goes out, your gas furnace will still keep you warm on a cold night.
Electric furnace vs. baseboard heating
Baseboard heating systems are a type of zone heating that allow you to control the temperature in individual rooms. The baseboard unit, which runs along the bottom of the wall, uses a metal heating element to generate and slowly release heat into the room where it’s placed.
Unlike an electric furnace, there’s no need for ducts or blowers like other forms of heating.
Why electric furnace is better
- Forced air is more energy efficient than baseboard heating which amounts to lower energy bills.
- It’s less restrictive when it comes to furniture placement and design. There is no fire risk and no wall units to worry about.
- Baseboard heaters have to be cleaned regularly to operate at their maximum efficiency. Forced air requires less cleaning to function properly.
Why baseboard heating is better
- Baseboard heating is inexpensive to install. The average upfront cost is around $500-1,000 per room.
- You can customize temperatures in each room by installing units where you need them.
- It runs quietly because there are no furnaces, ducts, and vents to make noise.
- There’s no need for ductwork, so it’s easier and less expensive to install.
Electric furnaces are an attractive option because of their lower upfront cost, but a heat pump is the most energy efficient option in every climate. As a result, heat pumps can save you the most money over time.
On average, American homeowners can save $557 per year on heating and cooling costs by making the switch from another heating source. Homeowners that currently use an electric furnace or baseboards and air conditioning can expect to save between $1,000 to $1,500 per year switching to a heat pump.
To learn more about heat pumps, check out our guide here.
The post The Problem With Electric Furnaces appeared first on Carbon Switch.
]]>The post The Problem With Baseboard Heat appeared first on Carbon Switch.
]]>On the surface, baseboard heat seems to have many advantages. Baseboard heaters are cheap and easy to install. They allow “zoned-heat,” giving you more control over the temperature of each room. And they don’t require ducts.
But there’s one big problem with baseboard heating: it’s incredibly expensive to operate. That is, homes with baseboard heat have much higher utility bills than homes with heat pumps or other HVAC systems.
In fact, according to an analysis we did recently for our heat pump savings guide, homes that use baseboard heat and traditional air conditioning spend on average $1,300 more per year than homes with heat pumps.
In this guide we’ll go over how baseboard heat works, the pros and cons of baseboard heating, and how they compare to ductless mini-split heat pumps and other heating systems.
How does baseboard heat work?
Baseboard heating systems are a type of zone heating that allow you to control the temperature in individual rooms. The baseboard unit, which runs along the bottom of the wall, uses a metal heating element to generate and slowly release heat into the room where it’s placed.
Like other electric resistance heating systems, baseboard heaters convert 100% of the energy they use into heat (compared to natural gas furnaces that generally only convert 80% of their energy into heat).
With baseboard heating, there’s no need for furnaces, ducts, or blowers. The unit creates heat from electricity, gas or water, and it slowly rises from the floor to the ceiling to warm the room.
Types of baseboard heaters
Electric baseboard heat
Electric baseboard heaters are the most common type in America. The heating elements inside are made of electric coils that heat up much like the heating elements in a toaster. A switch on the unit turns it on or off.
Hydronic baseboard heat
Instead of electricity, hydronic baseboard heaters use liquid to heat the copper coils inside the unit. These units are connected to a central boiler in the home that’s heated by gas, oil, or electricity.
Water or oil is heated in the boiler and then runs through pipes to the baseboard heater. When the liquid cools, it returns to the boiler to be reheated.
Baseboard heating cost
Upfront cost
Baseboard heaters generally cost about $500 per unit to install. So if you want to put them in 5 rooms, it will cost you $2,500.
But most of that $500 will go towards the labor of the installer you hire. Units only cost about $100 a piece. So you can bring that cost down significantly by installing the baseboards yourself. Here’s a good YouTube video on how to install baseboard heaters.
Annual cost
The average home in America is about 2,000 square feet and uses 35 million BTUs of energy for space heating. That’s the equivalent of about 10,000 kWh per year. So at an average price of $0.13 per kWh for electricity, that means baseboard heaters cost about $1,300 per year on average.
But if you live in a colder climate, you can expect that number to be much higher. For example, in the Northeast the average home uses about 50 million BTUs of energy for space heating, or roughly 15,000 kWh per year. And electricity costs about $0.20 per kWh there. So if you live in the Northeast, baseboard heaters cost about $3,000 per year.
Here’s a table showing how much it would cost the average homeowner to heat their home using baseboard by census region:
| Census region | Annual heating cost |
| South | $891 |
| Pacific | $944 |
| West | $1,069 |
| Mountain | $1,157 |
| Midwest | $2,100 |
| Middle Atlantic | $2,561 |
| Northeast | $3,036 |
Pros of baseboard heat
Like any heating option, there are pros and cons of baseboard heat. First, let’s look at the pros.
Zone heating
Baseboard heaters give you a way to control the temperature in individual rooms without the use of smart home technology. Bedrooms and living spaces can have the heaters turned on when they’re occupied and off when they aren’t.
If one room runs cooler than the others and needs a boost, a baseboard heater can raise the temperature in that room without cranking up the heat elsewhere.
While it’s tempting to think that this makes them more energy efficient than other types of heating, that’s not the case. As we mentioned earlier, homes that use baseboard heaters and traditional air conditioning spend about $1,300 more per year than homes that use other ductless heating systems like mini-split heat pumps.
Easy installation
Baseboard heating systems are easier and cheaper to install than other types of heating because they don’t require ductwork. The units are mounted to the wall and hardwired into the house’s electrical lines.
Even hydronic baseboard heaters that require tubing to run inside the walls, floors or ceilings are less expensive to install than ductwork.
This can make baseboard heaters a great option if you just need to heat a single room — like an infrequently used guest room or bathroom.
One thing to note for electric baseboard heating: there are both 120 volt baseboard heaters and 240 volt baseboard heaters. 120 volt baseboards are easier to install because they don’t require additional electrical upgrades. You can just plug them into an outlet. 240 volt baseboard heaters on the other hand require their own dedicated 20 amp circuit and 12-gauge wire.
The Spruce has a great article on how to install a 240-Volt electric baseboard heater.
Secondary source of heat
If you live in a place with extremely cold winters and your home doesn’t have proper insulation, an electric heat pump may not be able to keep up with below freezing temperatures. Baseboard heaters are a good solution for those days when you need supplemental heat in the most used spaces in your home.
That backup source of heat will keep your heat pump from constantly running in vain.
Cons of baseboard heat
There are downsides to baseboard heating systems that can make them impractical and expensive.
Baseboard heating cost
As we mentioned above, baseboard heaters cost a lot more to operate than other heating systems like heat pumps. You can expect to spend about anywhere from $500-1,500 more per year to heat a home with baseboards than a more efficient system like a ductless mini-split heat pump.
The placement of baseboard heaters — near windows and exterior walls — also makes them inefficient. Each unit has a thermostat on the unit that controls how much it works to heat up the room. If the thermostat senses cold nearby, such as drafts from old windows, it’s going to work even harder trying to keep the room warm.
That constant battling of cold drafts amounts to high utility bills, especially during the coldest months of winter.
Interior design
Electric baseboards get hot, which means you have to keep furniture and curtains at least six inches away from them to prevent fire.
You can’t use long drapes on windows that share a wall with a baseboard heater. You can’t have couches or beds up against those walls. All of this limits your interior design options and can make it difficult to place furniture in those rooms.
Safety hazard
Electric baseboard heaters get very hot. They pose a fire risk if things are placed too close or on top of them. If you have young children in the house, they can also be a burn risk.
The heating elements are tucked inside the unit, but the cover itself also heats up. You have to watch children constantly to make sure they don’t touch them when they’re on.
Hydronic baseboard heaters do not pose the same level of risk as electric baseboard heaters. While they do get hot, it’s not hot enough to start a fire.
Dry heat
The heat generated by baseboard heaters is a very dry heat. People who use them often get dry skin, dry throats, dry eyes and bloody noses.
You can use a humidifier to add moisture to the air, but that requires more electricity and regular cleaning.
Baseboard heating vs. forced air heating
Forced air heating is one of the most common ways to heat your home. The system draws in cool air from inside your home, heats it, and then distributes it through your home using ducts and vents.
What makes baseboard heating better
Baseboard heating has some benefits compared to forced air heating.
- You can customize temperatures in each room by installing units where you need them.
- It runs quietly because there’s no fan constantly blowing.
- There’s no need for ductwork, so it’s easier and less expensive to install.
What makes forced air heating better
Forced air beats baseboard heating in some major ways.
- Forced air is more energy efficient than baseboard heating which amounts to lower energy bills.
- It’s less restrictive when it comes to furniture placement and design. There is no fire risk and no wall units to worry about.
- Baseboard heaters have to be cleaned regularly to operate at their maximum efficiency. Forced air requires less cleaning to function properly.
Baseboard heat vs. ductless mini-splits
If you’re looking to upgrade your heating system, but forced air isn’t an option because of the ductwork or cost, there’s another option: a ductless mini-split heat pump.
As the name suggests, a ductless heat pump doesn’t use ducts to connect the air handlers. Individual air handlers are connected to a compressor outside with copper conduit that runs through the wall.
What makes baseboards better
Baseboard heaters have one major advantage over ductless mini-splits: they’re cheaper to install upfront.
The average cost of installing electric baseboard heating is $800 per room, while the upfront cost of a ductless heat pump system is closer to $2,000 per room. If you’re only replacing the heating system in one zone of the house and a heat pump is too expensive, baseboards might make sense.
But the lower upfront cost of baseboard heat will come back to bite you in the form of higher utility bills. As mentioned above, the average homeowner will spend about $1,300 more per year using baseboards and traditional air conditioning than a mini-split heat pump (which heats and cools a home).
What makes ductless heat pumps better
If you have the money to invest in a heat pump, it has a lot of advantages, especially when it comes to energy savings.
Heat pumps are far more energy efficient than baseboard heating. The average household could save about $1,300 per year by using a heat pump system instead of baseboard heating and traditional air conditioning, with a payback time of seven years. That energy savings also means that your annual carbon emissions can be reduced by 7.6 metric tons per household by making the switch.
Heat pumps also act as air conditioners. A heat pump heats your home in the winter and cools it in the summer, without the need for a separate unit. So when you install mini-splits you get the benefit of a zoned-air conditioning system too.
In general, mini-splits are a much better option than baseboard heaters. They cost more upfront, but deliver benefits in the form of comfort and bill savings for years.
To learn more about mini-splits, check out our heat pump buyer’s guide. Or check out how much it would cost to install a heat pump here.
The post The Problem With Baseboard Heat appeared first on Carbon Switch.
]]>The post How to Find the Best Smart Thermostat for Your Home appeared first on Carbon Switch.
]]>Installing a smart thermostat is one of the easiest ways to save money and energy. But choosing the best option — for example, a Nest vs. Ecobee or a Flair vs. Sensibo — can get complicated. In this article we’ll help you find the best smart thermostat for your home.
But first, let’s talk briefly about how much money, energy, and carbon emissions you can save by switching to a smart thermostat.
According to Energy Star, heating and cooling accounts for almost 50% of a home’s energy use at an average cost of $900 a year. Their studies have shown that smart thermostats can save people an average of $100 on their home energy bills a year.
For most smart thermostats, that means a return on investment in only one or two years, making it one of the most affordable energy saving upgrades you can make.
Smart thermostats are also a great way to cut your carbon footprint. According to a recent analysis we did, the average homeowner can cut their carbon footprint by 0.8 tons per year by making a switch. And if everyone in America switched to a smart thermostat we could reduce our country’s emissions by 22 million tons per year.
So what’s the best smart thermostat for your home?
We evaluated the top selling brands and models and looked at price, installation difficulty, compatibility, and product design to make our picks. Here’s what we found:
Best smart thermostat
Since the first smart thermostats began hitting the market over a decade ago, the offerings have gotten more and more sophisticated. What was once a few trailblazing models is now a crowded marketplace.
Out of the latest crop of smart thermostats, there are two that stand out in features, ease of use, and customer happiness: Ecobee’s Smart Thermostat with Voice Control and the Google Nest Learning Thermostat.
It was impossible to pick one over the other. They’re the same price, compatible with most home HVAC systems, and both feature smart software that makes saving energy a breeze.
Both models offer easy installation, sleek design and intuitive interfaces, and they both have multiple options for upgrading your experience with add-on sensors and the ability to work with multiple smart home systems.
Which one is best for you depends on your preference when it comes to their differences. Below is our evaluation of the Ecobee vs. Nest Learning Thermostat.
Ecobee Smart Thermostat with Voice Control Review
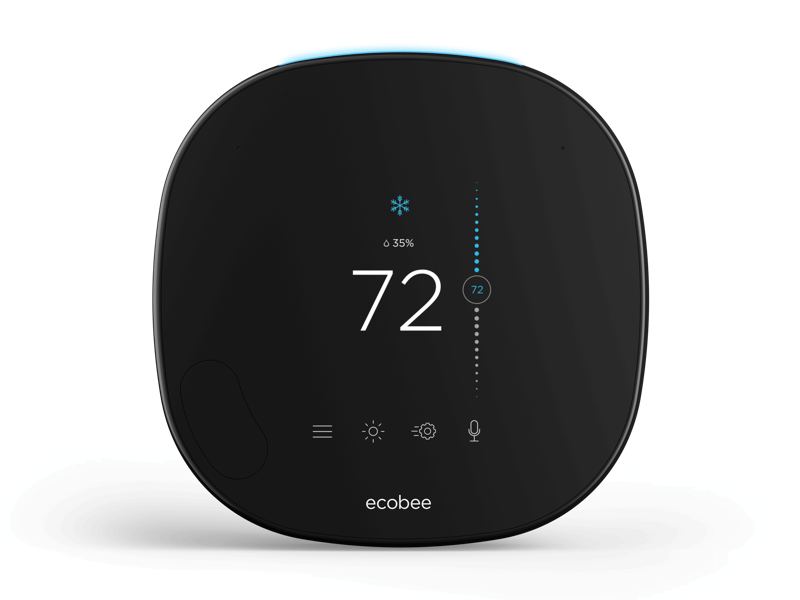
Bottom line: The best choice for those who want extra customization and control.
Price: $250
Pros:
- Built-in Alexa speaker that not only allows you to use voice control to change the temperature, but play music and control other smart home systems like lights.
- The best remote sensors on the market. It comes with one, but you can add up to 32 that measure room temperature and detect when a room is occupied. The system makes sure the rooms being used are at comfortable temperatures.
- Compatible with other major smart home systems like Apple HomeKit, Google Assistant, IFTTT, and SmartThings.
- Geofencing that detects when your phone is at home or away and automatically adjusts the temperature.
- eco+ mode that lets you set a preferred energy savings level and adjusts your heating and cooling to times of the day when prices are lower.
- Better compatibility and customization with 2-stage heat pumps.
Cons:
- Ecobee has a Schedule Assistant which makes suggestions to match your routine with the optimal settings, but it doesn’t make adjustments on its own like the Nest.
- Geofencing only works with Android and only one phone per household can be linked, which could be a problem for families or if you have roommates.
- It’s more expensive than options with less features like Nest’s low priced smart thermostat.
- Not compatible with mini-split heating and cooling systems or baseboard heaters.
Google Nest Learning Thermostat Review
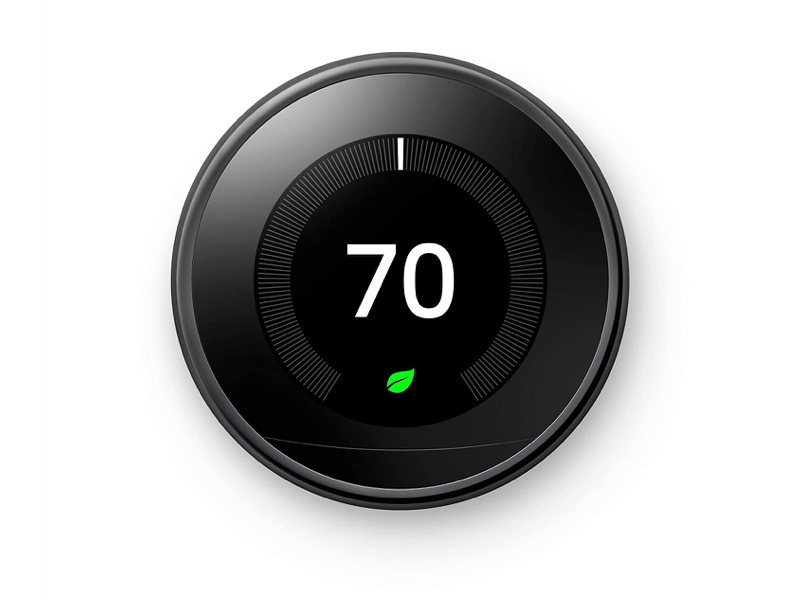
Bottom line: The best choice for those who want the software to do the work for them.
Price: $250
Pros:
- The best feature of the Nest Learning Thermostat has been and continues to be the learning software. Use it like a regular thermostat for a week and it will learn your routine and temperature preferences when you’re home and switch to energy efficient temperatures when you’re away. Unless you want to make changes, it programs itself.
- Compatible with many smart home systems like Google Assistant, Amazon Alexa, IFTTT, and SmartThings.
- Geofencing that detects when your phone is at home or away and automatically adjusts the temperature. Multiple phones and accounts can be connected.
- Works with Nest Temperature Sensors (sold separately) that let you program specific temperatures for certain rooms.
- Motion detector built into the unit to detect when you’re home or away.
Cons:
- Not compatible with Apple HomeKit.
- No remote sensors included. You can only connect up to six Nest Temperature Sensors, but they don’t detect occupancy like Ecobee’s.
- It’s more expensive than options with less features like Nest’s low priced smart thermostat.
- Not compatible with mini-split heating and cooling systems or baseboard heaters.
Best budget smart thermostat
If you don’t want to shell out $250 for a smart thermostat, consider the Nest’s base model, which is $130 and only lacks one major feature (compatibility with the remote sensors).
This is a great option if your home is the same temperature in every room.
Nest Thermostat Review
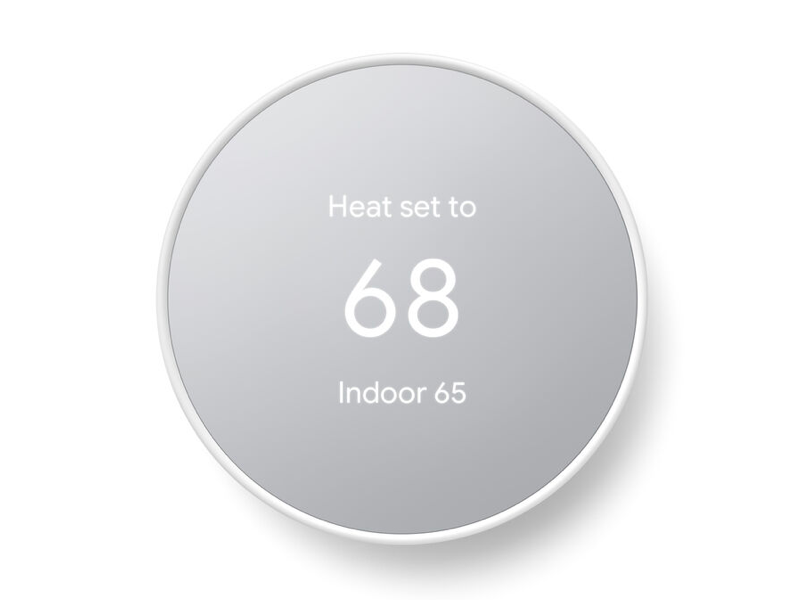
Price: $129
Pros:
- Connected app that lets you schedule your heating and cooling over a seven-day period and control the temperature remotely from anywhere.
- Geofencing that detects when your phone is at home or away and automatically adjusts the temperature.
- Compatible with Amazon Alexa and Google Assistant out of the box (and other smart home ecosystems like Apple HomeKit if you buy a smart home bridge).
- Easy to use interface.
Cons:
- It doesn’t have the ability to learn your schedule or connect with remote sensors for more precise climate control and motion detection.
- It’s made out of a cheaper plastic material than the Nest Learning thermostat.
- Not compatible with mini-split heating and cooling systems.
Best smart thermostat for mini-splits
We evaluated the most popular mini-split smart thermostats on the market (the Flair Puck, Sensibo’s Sky and Air models, and Ambi’s Climate and Mini).
Our favorite option was the Flair Puck. It stood out for 3 reasons:
- It’s the only option that can be controlled directly from the hardware (as opposed to the app).
- Each Flair Puck comes with wall-mounting accessories.
- They offer the best customer service of any of the three companies we evaluated.
However, at $119 per controller, the Flair Puck is more expensive than the Sensibo Sky ($79) and Air ($99). That’s why the Sensibo Sky is our budget pick. If you want to save some money and don’t care about wall-mounting or controlling the temperature from the hardware, go with the Sensibo Sky.
If you want to connect to your Apple HomeKit, your only option today is the Sensibo Air.
While we liked the Ambi Climate Mini, we didn’t like the Ambi Climate 2. It’s the only option on the market that offers “learning” AI technology like the Nest. But at $149 per controller, we don’t think it’s worth the money.
For a more detailed look at each option, check out the pros and cons of each one below:
Flair Puck Review
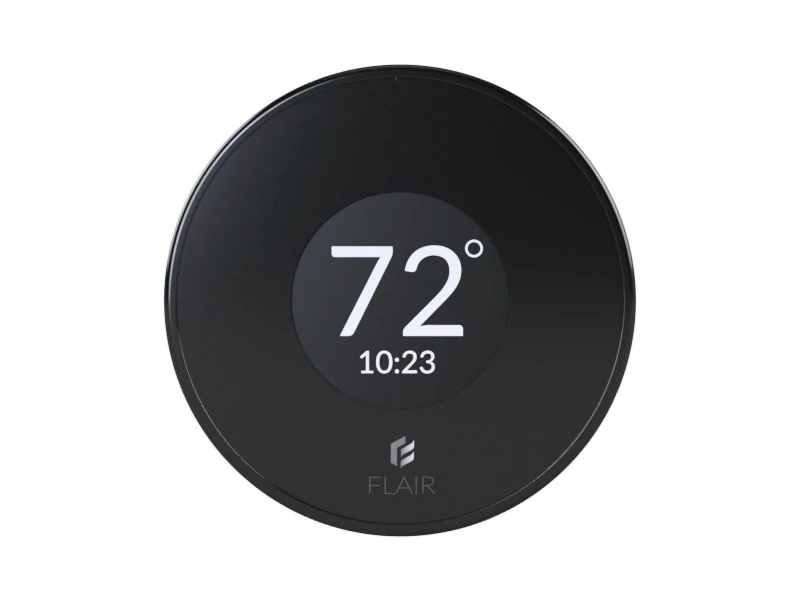
Price: $119
Pros:
- You can control the temperature directly from the puck, which means you don’t have to get out your phone or app every time.
- Wall-mounting option. This is nice if you don’t want to clutter your bedside table or counter. Note: The Ambi Climate Mini also offers this feature.
- The best customer service of any of the companies we looked at.
- Compatible with most mini-splits. You can check if yours is compatible by looking at the remote. Fully compatible devices will display the set point temperature and fan speed.
- Compatible with Alexa and Google Home.
Cons:
- Expensive if you have multiple mini-splits. For example, if you have 4 mini-splits it’d cost $480 to connect all four to Pucks. Sensibo Sky’s on the other hand would cost $276 for the same set up.
- Not compatible with Apple HomeKit. The Sensibo Air is the only model we found that is.
- Unintuitive, hard to use mobile app. Though, every model out there has this problem. And Flair is the only option that lets you control the temperature without the app (i.e. directly from the hardware).
Sensibo Sky Review
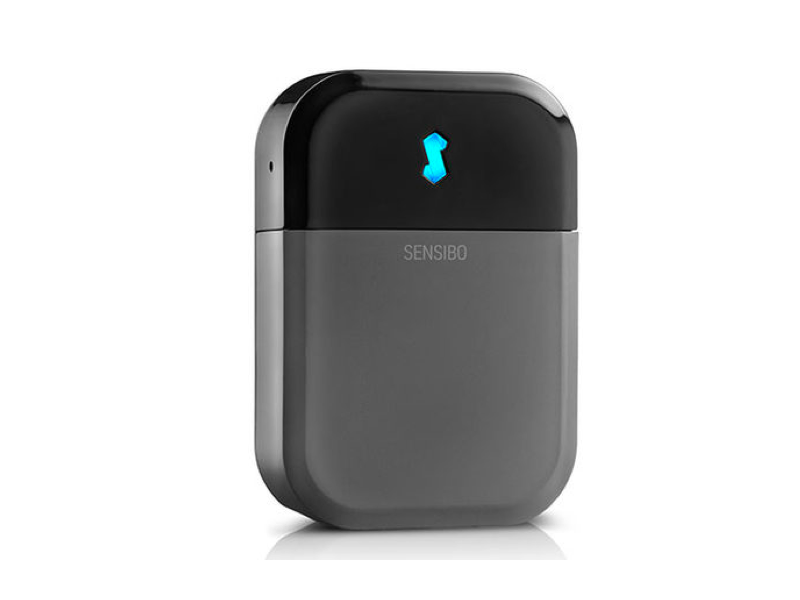
Price: $79
Pros:
- Cheapest option on the market. If you need to control four mini-splits it’ll only cost you $276 compared to $480 for the Flair Puck and Ambi Climate Mini or $600 for the Ambi Climate 2.
- Compatible with most mini-splits on the market. The company claims that it will work with 10,000 models and anything that has a remote controller.
- Technically you can mount it on the wall. But this requires a third-party wall-mount.
- Compatible with Google Home, Alexa, and Apple Siri (though not HomeKit).
Cons:
- Unintuitive, hard to use app that you have to use if you want to change the temperature. With the Flair Puck you have the ability to control the temperature from the hardware or app.
- There are some complaints online about the company sending “vaguely spam-y looking emails” trying to upsell other products.
Sensibo Air Review
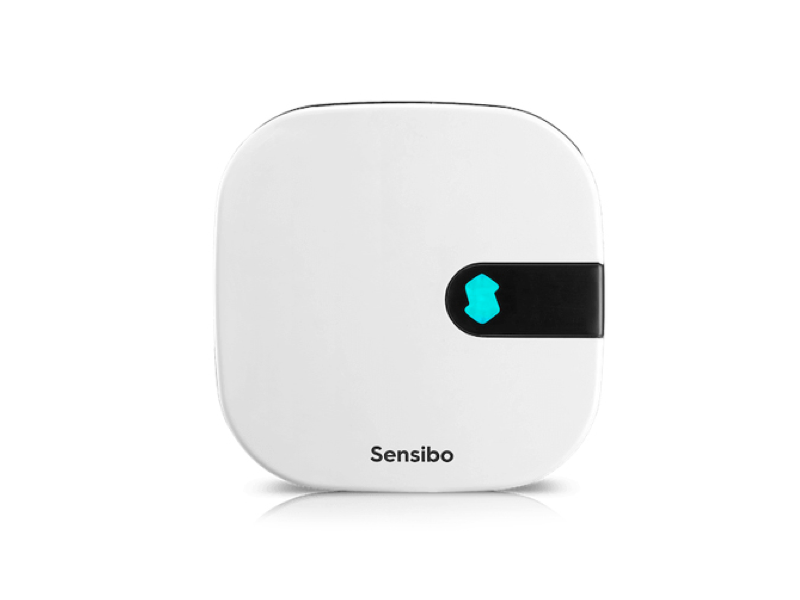
Price: $99
Pros:
- Cheaper than similar options from Ambi and Flair. This is especially good if you have a lot of mini-splits you want to control. Four Sensibo Air’s cost $356 compared to $480 for Flair Pucks and Ambi Climate Minis.
- The only model on the market that offers full Apple Home Kit compatibility. It is also compatible with Alexa and Google Home.
- Compatible with most mini-splits on the market. The company claims that it will work with 10,000 models and anything that has a remote controller.
Cons:
- You can’t mount the controller on the wall like the Flair Puck.
- Unintuitive, hard to use app that you have to use if you want to change the temperature. With the Flair Puck you have the ability to control the temperature from the hardware or app.
- There are some complaints online about the company sending “vaguely spam-y looking emails” trying to upsell other products.
Ambi Climate Mini Review
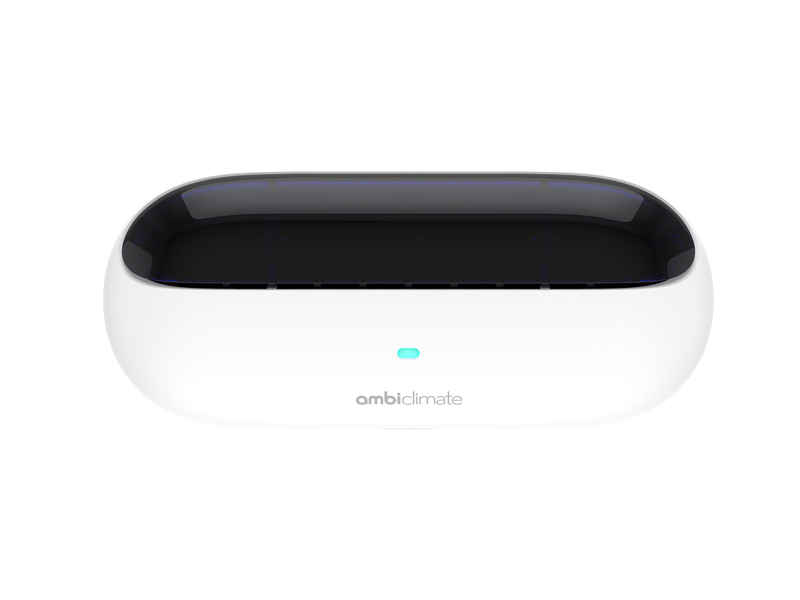
Price: $129
Pros:
- Cheaper than the Ambi Climate 2 by $130 per controller without losing many features. The only difference between the two is the Climate 2’s learning feature, which we didn’t find that compelling.
- Wall-mounting option. This is nice if you don’t want to clutter your bedside table or counter.
- Compatible with Alexa and Google Home.
Cons:
- Not compatible with Apple HomeKit. The Sensibo Air is the only model we found that is.
- Expensive if you have multiple mini-splits. For example, if you have 4 mini-splits it’d cost $480 to connect all four to Pucks. Sensibo Sky’s on the other hand would cost $276 for the same set up.
Ambi Climate 2 Review
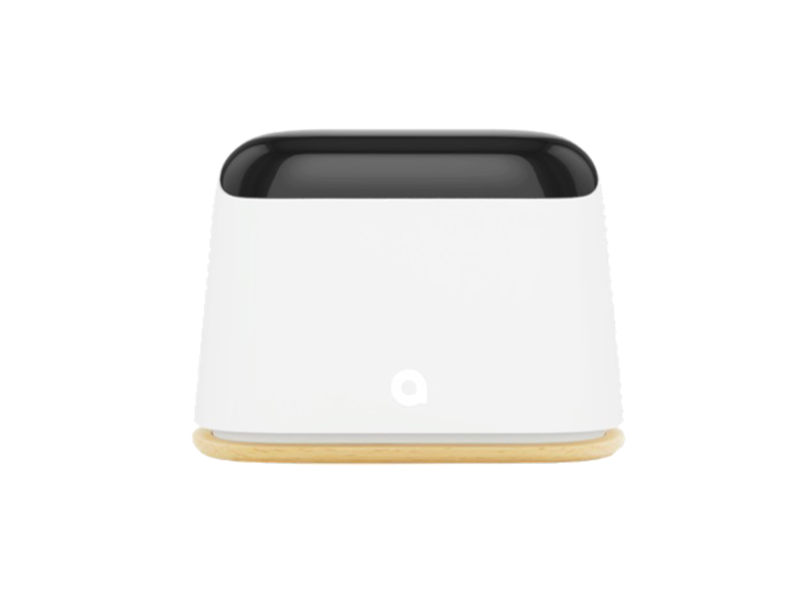
Price: $149
Pros:
- It learns your patterns and behavior to predict when to turn on or off your mini-split. As of writing this is the only mini-split controller that does this.
- Compatible with most mini-splits on the market. You can check if yours is compatible here.
- Compatible with Alexa and Google Home.
Cons:
- Most expensive option on the market. At $250 per controller, it’d cost $1,000 to connect four mini-splits. The Sensibo Sky would cost $276 for comparison.
- Not compatible with Apple HomeKit. The Sensibo Air is the only model we found that is.
Best smart thermostat for baseboard or radiant heat
There are limited options for homes with high voltage heaters, but our pick ticks all of the boxes you’d want in a smart thermostat.
Mysa Smart Thermostat Review
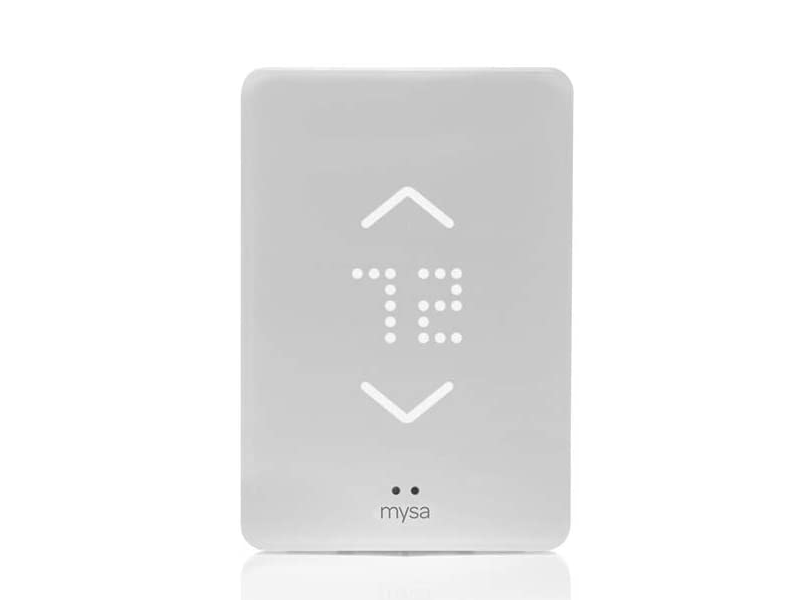
Price: $139 for electric baseboard heaters, $199 for electric in-floor heaters
Pros:
- App allows you to control in-home temperatures from anywhere and schedule temperature settings.
- Automatically sets home and away temperatures using geofencing.
- Compatible with most smart home systems including Amazon Alexa, Google Assistant, Apple HomeKit, and SmartThings.
- Good looking design.
- Eco mode software that helps you to save more energy with small temperature adjustments without sacrificing comfort.
Cons:
- Expensive if you need to put one in multiple rooms.
Best smart thermostat for home automation enthusiasts
Ecobee Smart Thermostat with Voice Control
See above for why this model is tied for the best you can buy, but let’s look at what makes it especially suited for your home automation setup.
- It comes with Alexa already built in, but it can work with the other major smart home ecosystems you may have in place, including Apple HomeKit. You can use voice control to make adjustments to any compatible smart devices in your home.
- Ecobee offers other smart devices that pair with it seamlessly like its remote room temperature sensors with motion detection, smart cameras and smart door and window sensors.
- When linked with other smart devices, you unlock more energy saving features. For example, if your window or door sensors detect that one or more have been open for five minutes, Ecobee will shut off your air conditioning to save energy.
What to look for when buying a smart thermostat
All of the models in this guide have great features that can help save energy and money, but there are a lot of factors that go into determining which model out there is the best for your home and needs.
When shopping for a smart thermostat you’ll want to consider the following:
C wire requirement
When you remove your old thermostat from the wall, you’ll see a few wires with different purposes within your HVAC system. One of those is likely the common wire, or C wire, which provides power to your thermostat.
Most newer HVAC systems have a C wire in place, but older systems may not.
Some smart thermostat models like those from Ecobee and Honeywell require a C wire for installation, while others like the Nest don’t. All brands recommend using one.
Don’t have a C wire? Here are your options:
- Use the included power extender kits that come with Ecobee and Honeywell thermostats to hardwire a solution yourself. This is more advanced than the basic installation and you’ll want to use video tutorials provided by the brand or one of the many you can find on YouTube to guide you.
- Have an electrician install a C wire for about $150. While a more expensive option, this will give you peace of mind that everything is set up correctly and safely.
- Go with a Nest thermostat, which can get the small amount of power it needs from its internal battery and another wire. Be aware that a few types of systems are not compatible with the Nest without use of a C wire. Use this handy compatibility checker before you buy.
Ease of installation
Unless you have a complex HVAC system, all of our recommended models should be easy to install in about 30 to 45 minutes. The devices come with clear instructions and the brands have video tutorials that take the guesswork out of it.
If your system has multiple components controlled by the thermostat like a dehumidifier or heat pump, you might want to let a professional handle the installation so you don’t do any damage.
In most cases, the installation will be simple and quick, but here are a couple tips to make it even easier:
- Take note of the wiring of your old thermostat before removing it so you know which wires go where. Taking a picture is even better.
- Make sure you know what type of HVAC system you have (gas, oil, electric, propane, forced air, radiant) because you’ll need that information during the set up.
Geofencing
Geofencing is a feature that creates a boundary around your home using the GPS on your phone and the smart thermostat’s app.
When you, or specifically your phone, are within that boundary, the thermostat keeps your settings at your preferred “at home” temperatures. When the app detects that you’ve left that boundary, it will adjust the temperature to be more energy efficient.
Geofencing is great for people who don’t have set schedules or who come and go a lot during the day. If you have a consistent home and away schedule and want to lean on the learning features of a smart thermostat, you may prefer to keep this feature deactivated unless you’re going out of town or otherwise breaking from your schedule.
Many models offer geofencing, but they differ in compatibility. Check to make sure that the smart thermostat you choose supports geofencing with your phone’s operating system. Some only allow one phone to be connected per household, while others allow multiple phones to be tied to the geofencing.
If multiple phones are connected, the thermostat would switch to your away settings only once the last phone left the boundary.
High-voltage heater support
If you have a central HVAC system, you basically have your pick of smart thermostats. Those with high voltage heaters like baseboard, radiant, or forced fan convectors will have to look for a model designed to work with those systems.
Most smart thermostats like the Ecobee and Nest are made to work with a low voltage system. Hooking them up to a high voltage system can be dangerous and the workarounds that exist can negate the energy savings you’re trying to achieve. Stick with one meant for your high voltage heater like the Mysa.
Sensors
While geofencing is an easy way to automate your home and away settings, sensors can give you more precise control.
Most brands have additional smart sensors that can be linked to your thermostat. Those sensors can be placed in the rooms where you need better climate control. If a room you spend a lot of time in tends to run hot or cool compared to the rest of the house, your system will run until that room is at the preferred temperature.
Prioritizing the temperature in certain rooms can be a way to keep your thermostat from wasting energy on regulating the temperature in rooms that aren’t used as often.
These sensors also detect motion so that the system will return to “at home” settings when someone is in those rooms, as opposed to relying on a connected phone for geofencing.
Many of the smart thermostat models have motion sensors in the unit itself for detecting when you’re home or away and some can also link to door or window sensors that are part of your smart home set up.
Smart home system integration
If you’re already a smart home enthusiast, you’ll want to make sure that the thermostat you choose is compatible with the smart home system you already use. The top of the line models work with many of the most popular systems like Amazon Echo, Google Home, IFTTT, Apple HomeKit and Samsung’s SmartThings, but there are exceptions like the Nest not working with Apple HomeKit, so double check.
If a smart thermostat is your first step into home automation, many of the brands have additional devices like smart cameras and window and door sensors to easily expand your setup if you wish.
User interface and design
A smart thermostat can have all of the best features, but if you can’t figure out how to use them, you’ll never benefit from them.
Our top picks not only look great on the wall with clear displays and sleek designs, but the controls are easy to read and intuitive to use. That goes for the connected apps as well.
A smart thermostat’s design should make it easy to utilize its energy saving features, not be a hindrance.
Rebates
While smart thermostats are inexpensive compared to say rooftop solar, $250 is nothing to sneeze at. The good news is that you may be able to cut a large chunk off the price with rebates.
Many of the models, including the ones we mentioned in this guide, are Energy Star certified. That means they’re eligible for rebates from utilities or government programs around the U.S.. The one exception is the Mysa, but only because Energy Star doesn’t have a category for that type of thermostat yet. Go here to see how much you can get back in your area.
Also, some utilities offer cash incentives if you sign up for their demand response program. That’s when you agree to let the utility raise (or lower) your thermostat a few degrees when demand is highest, such as during peak hours or on particularly hot days.
Where I live in Austin, Tex., people are eligible for a $25 rebate and $85 for signing up for demand response. That would take the price of our best thermostats from $250 down to $140, an amount that could be recouped in around a year.
The post How to Find the Best Smart Thermostat for Your Home appeared first on Carbon Switch.
]]>